Facebook Brand Pages: How to Create A Simple Facebook Business Page
With all the changes going on over at Facebook, we thought it would be a good idea to put together a quick how-to on setting up and using the new Facebook Timeline for Brand Pages.
A Facebook page should not be confused with a Facebook profile. Profiles are for people and pages are for businesses—it’s as simple as that.
To create a business page, click here (you will need to be signed in to your personal Facebook profile). You’ll have the option to pick the kind of page you want (for this example, we’re setting up a fictitious Local Business):
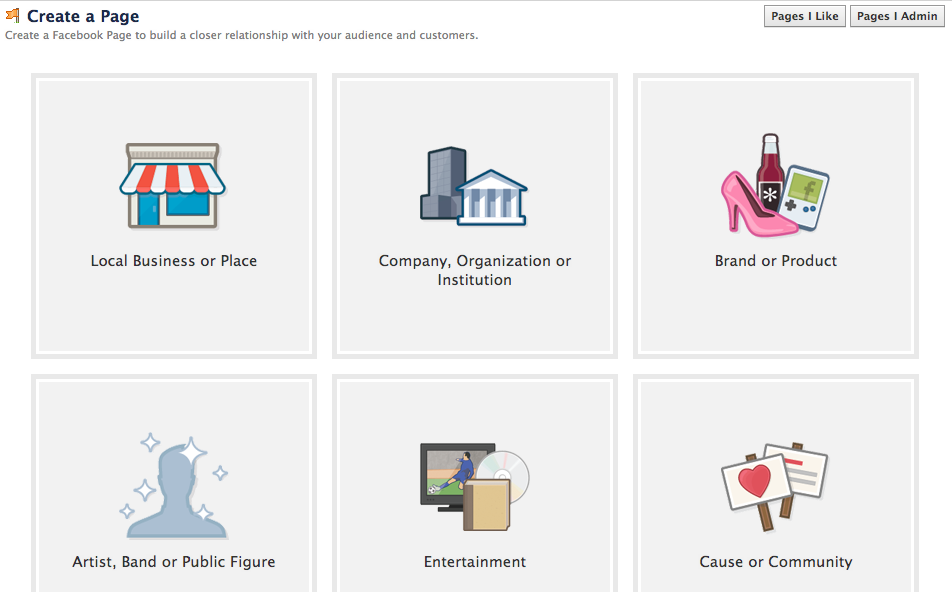
You will need to fill in all the information—no blank fields allowed—and accept the terms and conditions.
After doing so, you’ll have the option to upload an image for your profile picture. Now, this is something Facebook has changed in their newest update. It used to be that you could make your profile image very long but now, you are restricted to an image of 181×181.
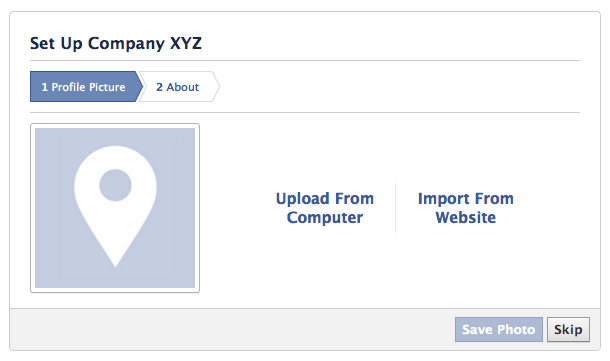
You can skip this step but really, you want your business to be identifiable, so why not go ahead and upload your profile image now? The company logo always makes a great profile image.
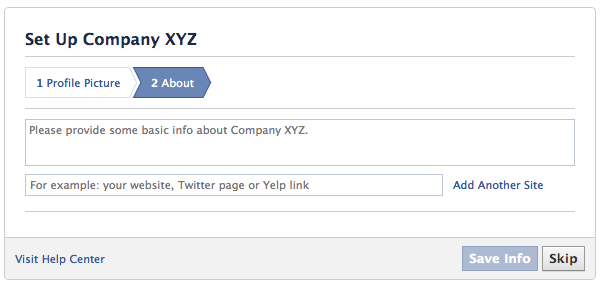
Then you’re going to add in some of your basic information and your website address. Don’t worry—you can always go back in and change this stuff later, but it’s good to get something in there so you don’t forget about it. Note that you can add more than one site so feel free to link to your website, twitter account, linkedin profile—you name it!
Then you are going to be taken through a few more options that, unfortunately, we can’t get you screenshots for. But to give you an idea, you’ll be asked to like your page (do it), invite friends (up to you), and post something to your new timeline.
Then, you will see your all new Admin Panel (later you will find a button to access this drop-down panel on the top right hand side).
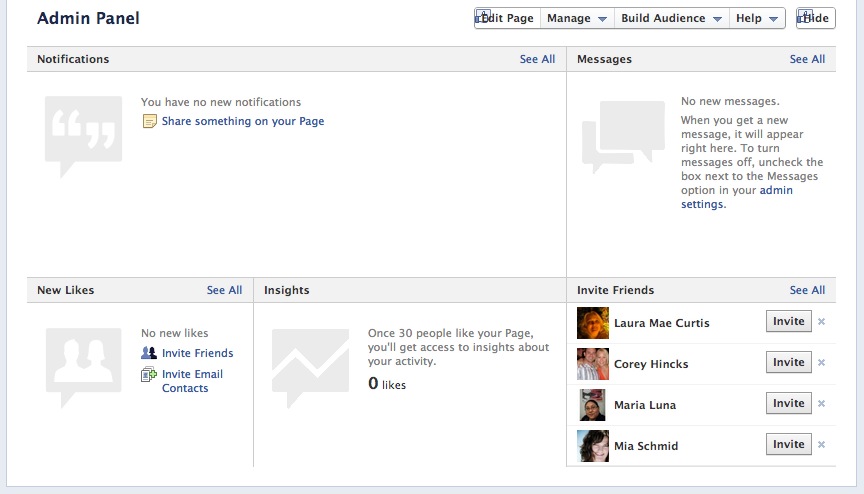
The Admin Panel has some great new features. It shows the latest notifications (people who have commented, shared, or posted on your page), a new messaging system where people can start a private conversation with you (a great tool for addressing individual customer concerns with one caveat: you cannot start the message—the customer has to).
Rounding out the features, you’ll also see the newest people who have ‘liked’ your page and tracking information for your the reach and popularity of your brand page.
Now you see your page a bit more complete and ready for you to start posting and customizing things a bit.
First up, a cover photo. The cover photo occupies the large space that runs along the top and spans from left to right. This space will hold an 851px x 315px image. To upload a cover photo, you will see ‘Add a Cover’ in the right hand corner.
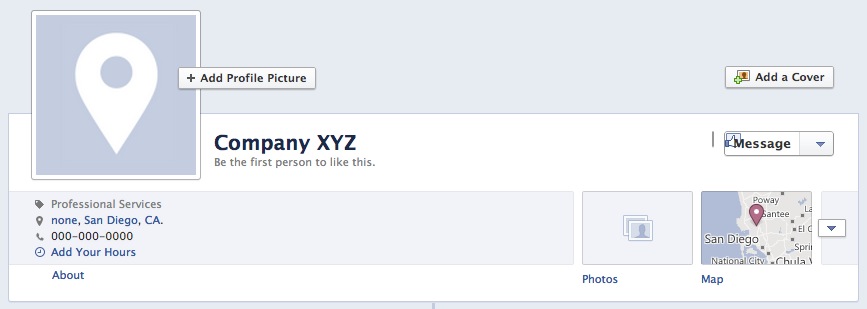
You’ll also see that there are boxes to the right of the ‘About Section’. Take note: You can add more buttons here (up to 4 across and two rows down) and you can rearrange the order they appear in all except for the ‘Photos’ button, which is in a fixed position (1st).
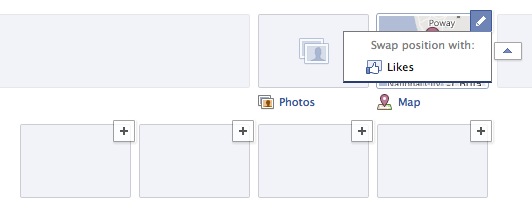
To switch buttons around, click on the arrow to the right and you’ll see the second row appear. Now when you mouseover the button you want to move, you’ll see a pencil appear as well as a message asking which button you want to swap positions with.
Now you are ready to start posting. We can’t really help you out too much in this area but we can give you a few pointers.
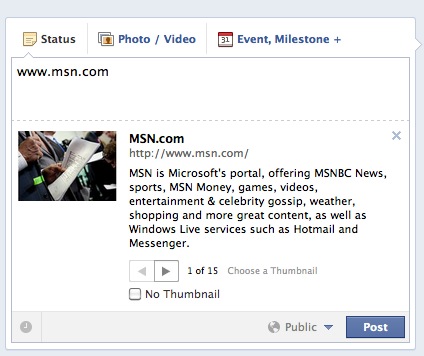
#1: If you’re sharing a link, all you have to do is paste the link into the status box and you’ll see a preview pop up (sometimes you have to put a space after the link). You can change any of the information pulled up by double clicking on it. Or you can change the generated thumbnail by using the arrow keys. If you don’t see a thumbnail you like, you can choose not to use one by clicking ‘No Thumbnail’.
Once you have everything how you like it, delete the original link you posted (where it says www.msn.com in the example below)
#2: For really important things, use ‘Milestone’. You can talk about the event, give it a date, etc. It’ll be shown on your timeline like a nice big announcement. This is a great way to tell your company story and history
#3: Pinning and highlighting are two new features. By pinning a post, it stays at the top of your Facebook Page. Highlighting will make it large like a milestone. Play with both and see what you like
#4: Don’t be stingy but don’t bug. Post regularly but don’t post every 10 seconds. In the same vein, the content you choose should be relevant to your company and/or product you are offering.
And that’s it. That’s our simple Facebook Brand page tutorial. If you would like help designing any Facebook options (Facebook covers, custom Facebook pages, etc), send us an email.
Or for more info direction from the source, check out the full Facebook Manual here.
